The map view is shown when you have no planned route. Your actual location is shown as soon as your Rider has found your GPS location.
You can use map view in the same way as you might look at a traditional paper map. You can move around the map using gestures, and zoom using the zoom buttons.
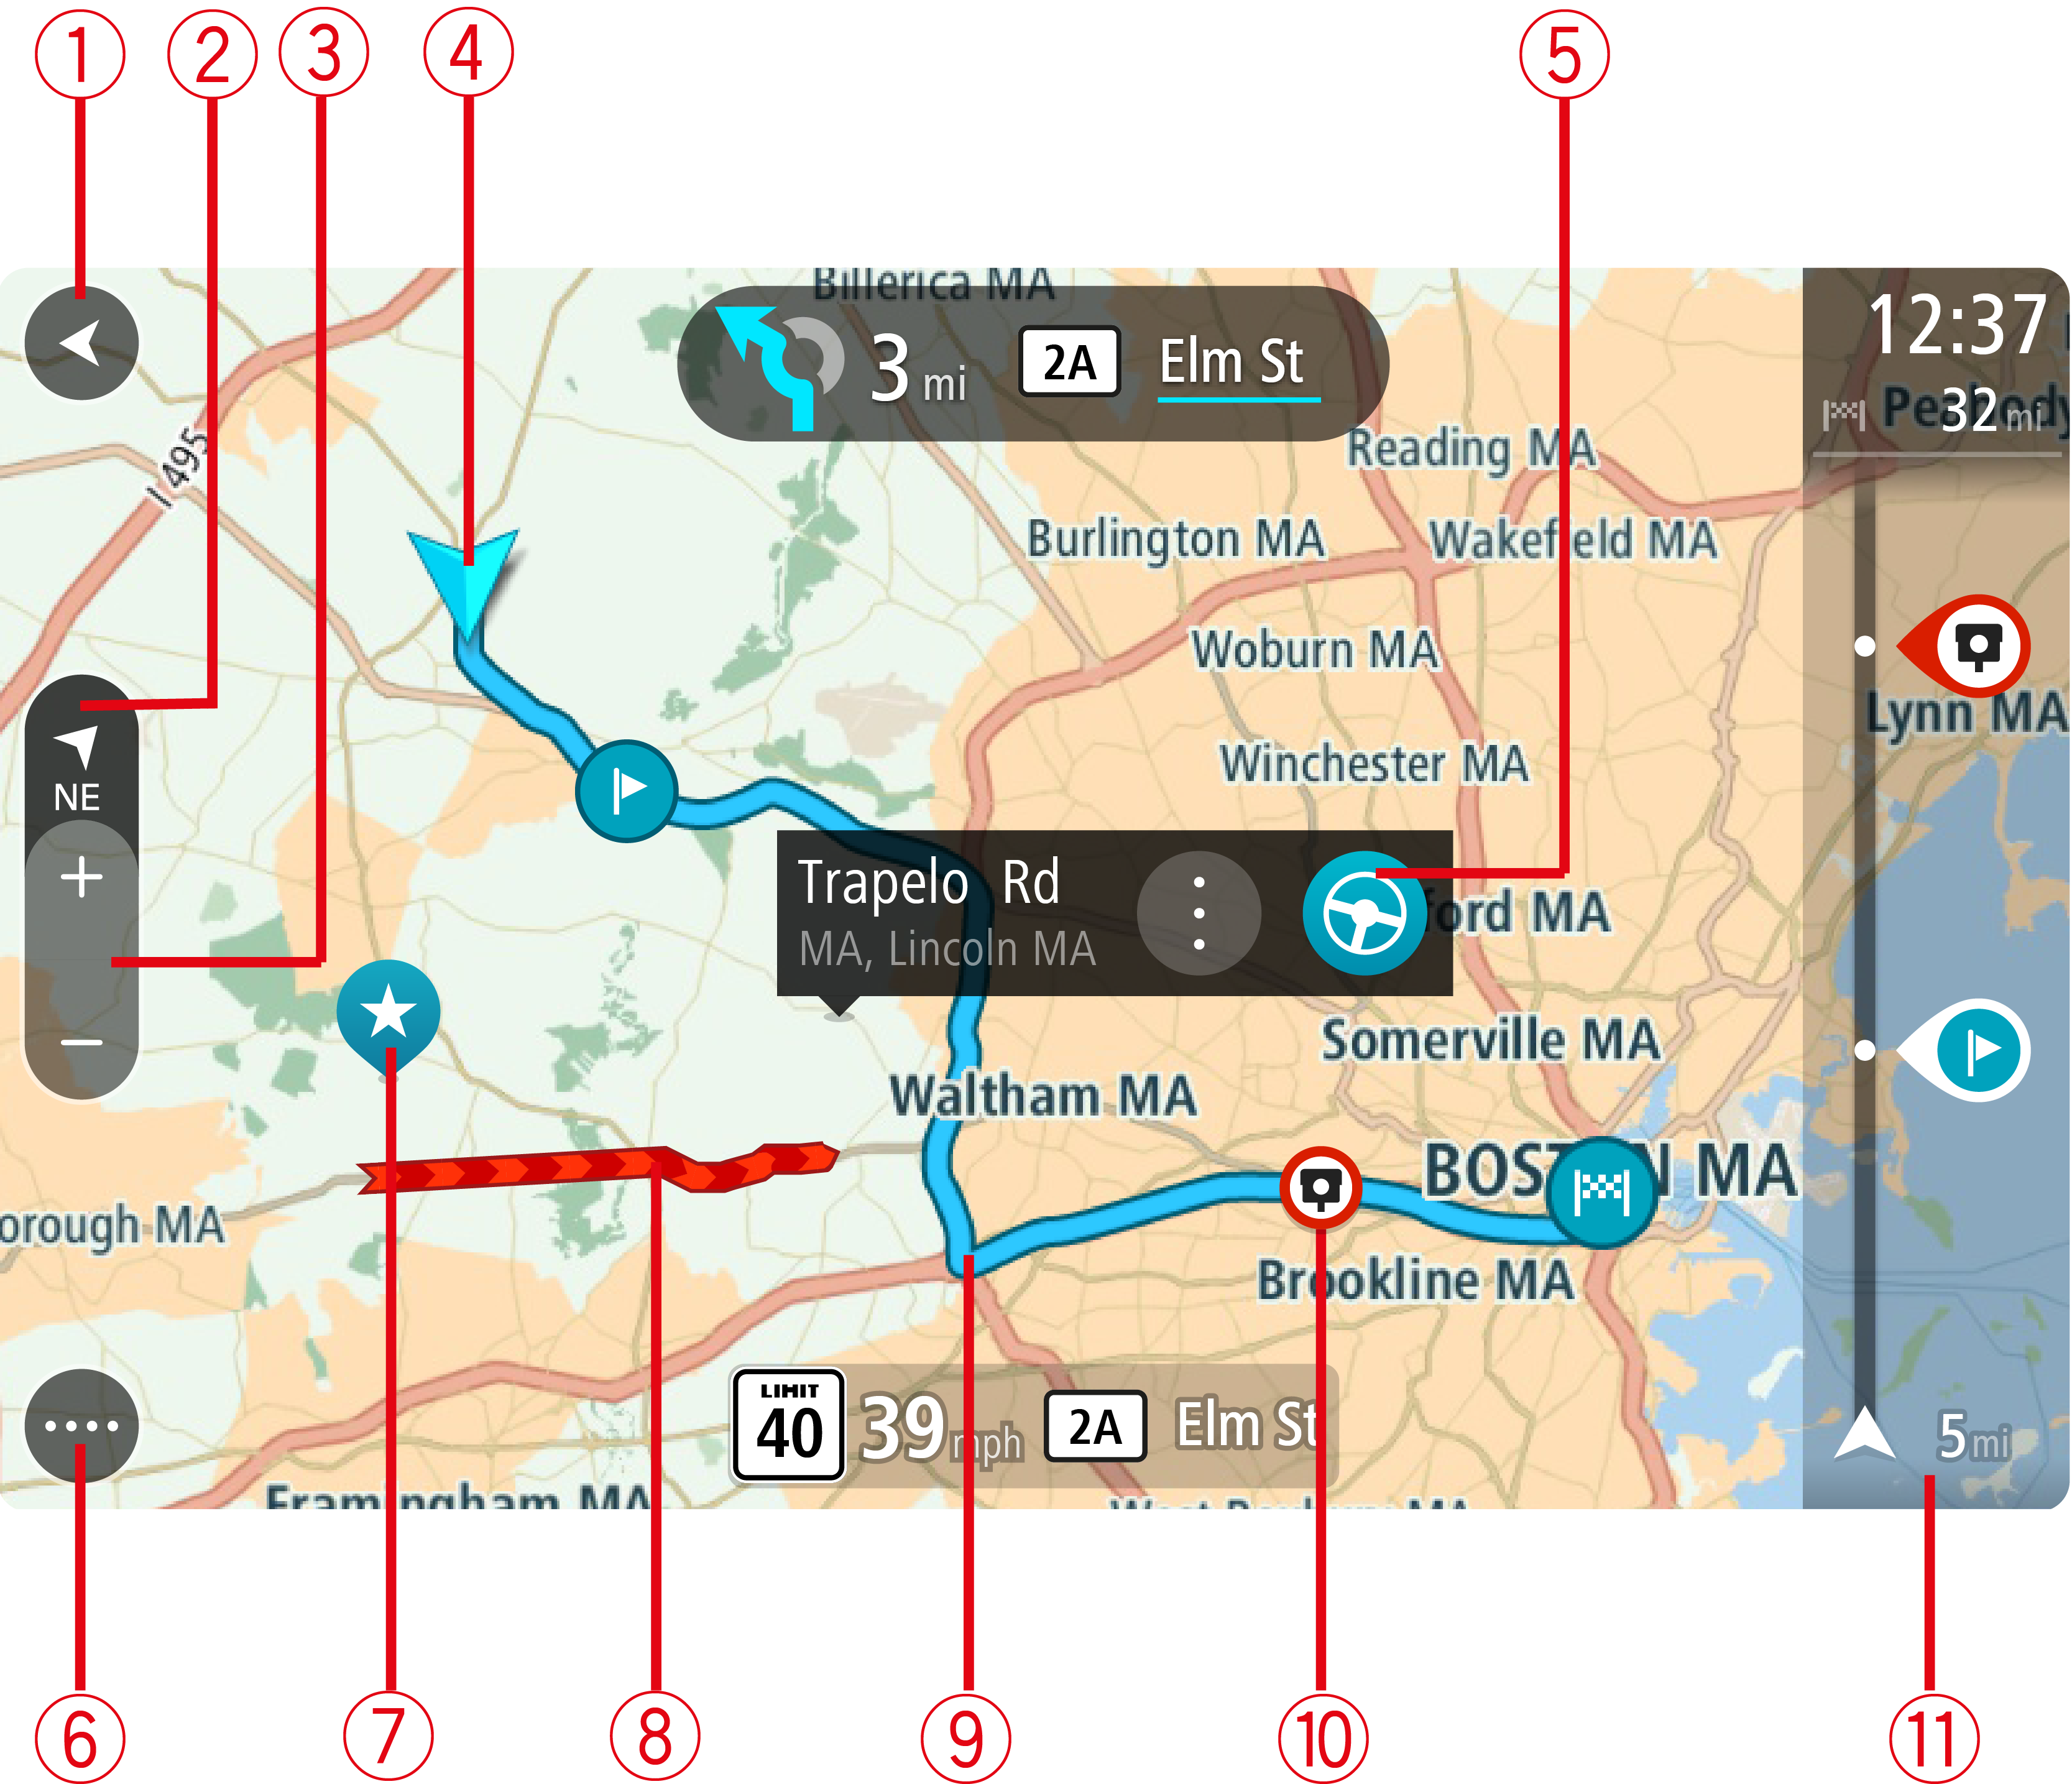
Important: Everything on the map is interactive, including the route and the map symbols - try selecting something and see what it does!
Tip: To open a pop-up menu for an item on the map, for example a route or a POI, select the item to open the menu. To select a location on the map, select and hold the location until the pop-up menu opens.
The map shows your current location and many other locations such as your My Places locations.
If you have not planned a route, the map is zoomed out to show the area around your location.
If you have planned a route, your complete route is shown on the map. You can add stops to your route directly from the map. When you start to drive, the guidance view is shown.
When in map view, if you are driving, the small arrow rotates to indicate your direction of travel relative to north, with north being up.
Tip: The compass direction you are driving is shown in the switch view button below the small compass arrow, for example, NE for North East. These compass directions automatically appear when driving in North America and disappear if you leave North America.
Note: If your Rider cannot find your location the symbol appears grey.
Note: You cannot change the current location symbol.
 Your destination.
 Your home location. You can set your home location in My Places.
 Your work location. You can set your work location in My Places.
 A stop on your route.
 A location saved in My Places.
 A marked location.


 Symbols to show your community POI locations.
Select a map symbol to open the pop-up menu, then select the menu button to see a list of actions you can take.